Getting started with Video Campaigns

Who is it for?
Video campaigns is a product for marketers who want to send personalized video campaigns, at scale. To use this product, we assume that you, the marketer, is working with an email marketing platform such as Hubspot, Mailchimp or other (it works with any).
How is it different from other personalized video campaigns products?
While there are other products that create personalized videos, they require the user to generate all their videos in advance. Considering email open rate and click-through-rate (CTR), that means that the vast majority of the videos generated (and paid for), will never be viewed. D-ID, however, uses its real time AI capabilities to stream the videos on demand. That means that we only charge credits for customers who have opened the email and clicked the video link.
How much does it cost?
Since we’re streaming the campaign videos, you will be charged based on streaming costs (1 credit = 30 seconds of streaming).
How can I predict the cost?
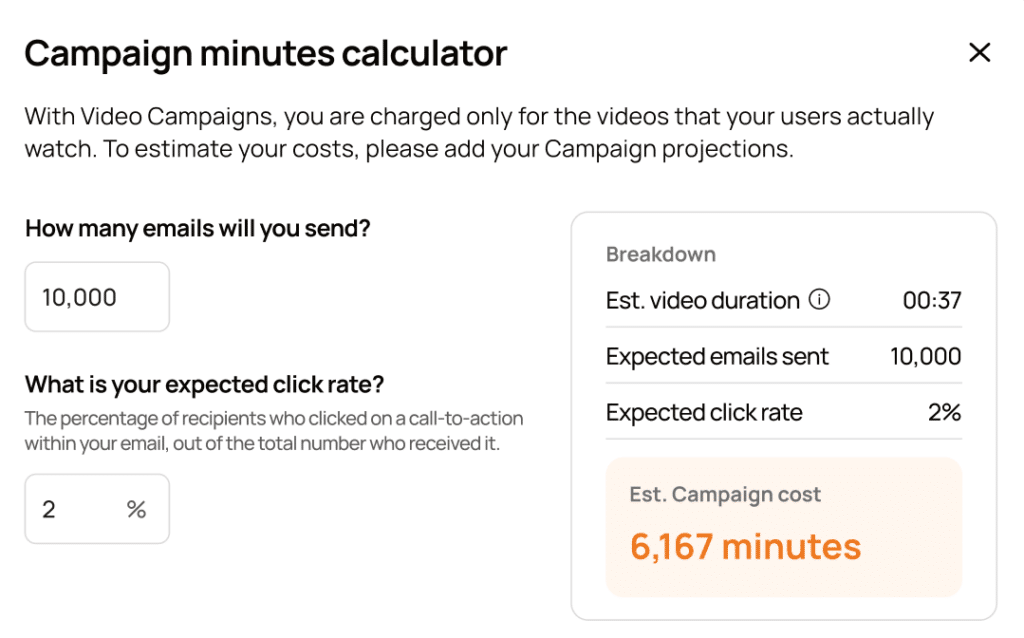
Use our credits calculator to estimate your campaign credits consumption. Enter your campaign’s expected recipient count, and your expected click rate, and we’ll calculate your credits cost (we’ll be estimating your video duration):
How to use
First, click ‘Create campaign’
Step 1: Choose avatar
Step 2: Avatar script
Choose language and voice
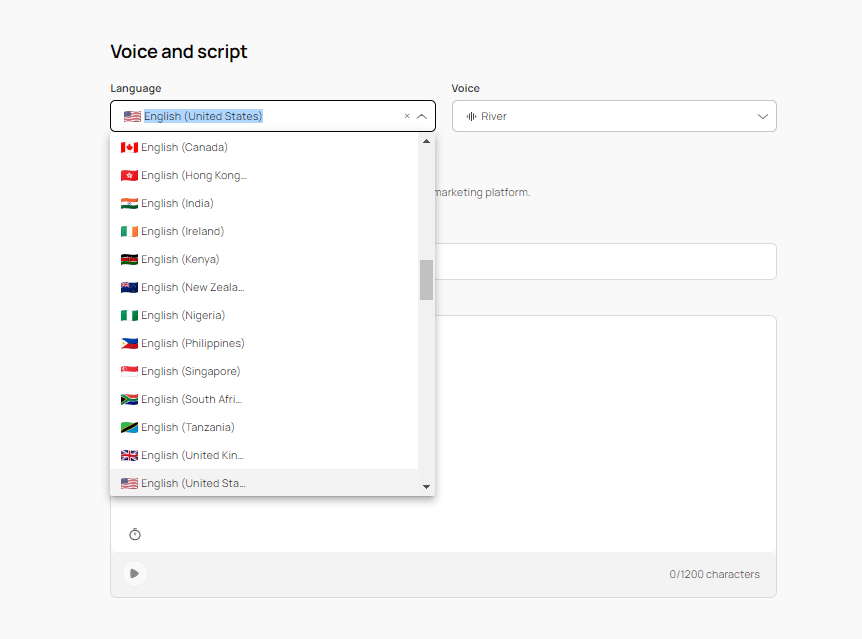
Then, add the dynamic fields (personalized fields) you’d like to use in your script, just as they appear in your email marketing platform.
For example, if you’d like the avatar to address the user by her first name and using Hubspot, add {{contact.firstname}}, and click Enter. If you’re using Mailchimp, add *|FNAME|* for the same purpose.

Once you’ve added your dynamic fields, it’s time to write the avatar script. To add a dynamic field to the script, simply click the field and it will be added.
Watch this video tutorial to learn more:
Step 3: Design the video page
Since email clients cannot play video inside an email, we will provide you an avatar-animated GIF thumbnail to be included in your email. When your users will click it, they will be directed to your video landing page.
You can:
- Add your logo
- Add title
- Add description
- Add a call to action, and design it
Step 4: Publish your campaign:
Once you’ve created your campaign, it’s default is set to “unpublished.” Use the campaign menu to publish it:
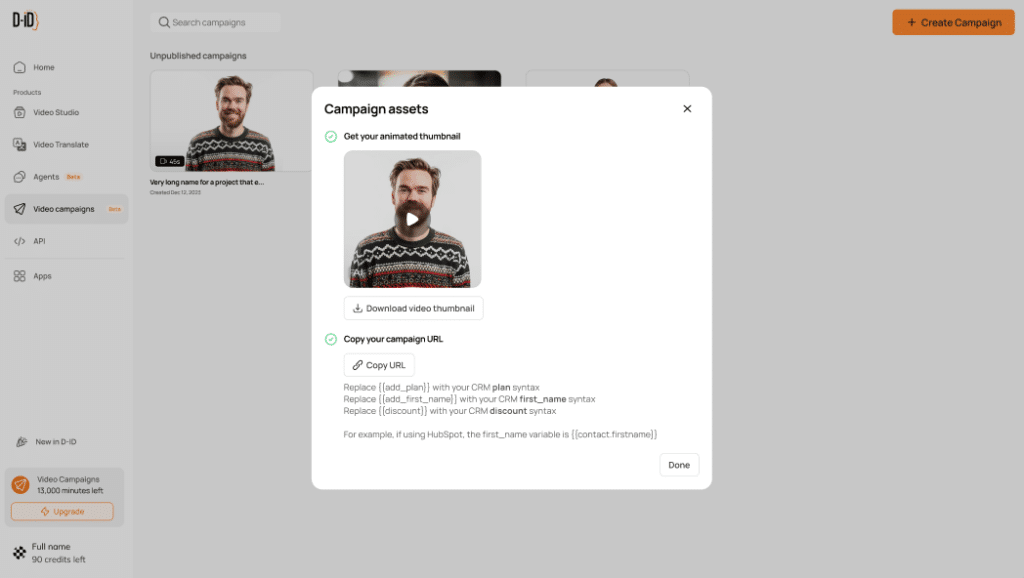
From the Publish campaign modal, copy the animated GIF and paste it into your email campaign editor in your chosen email provider:
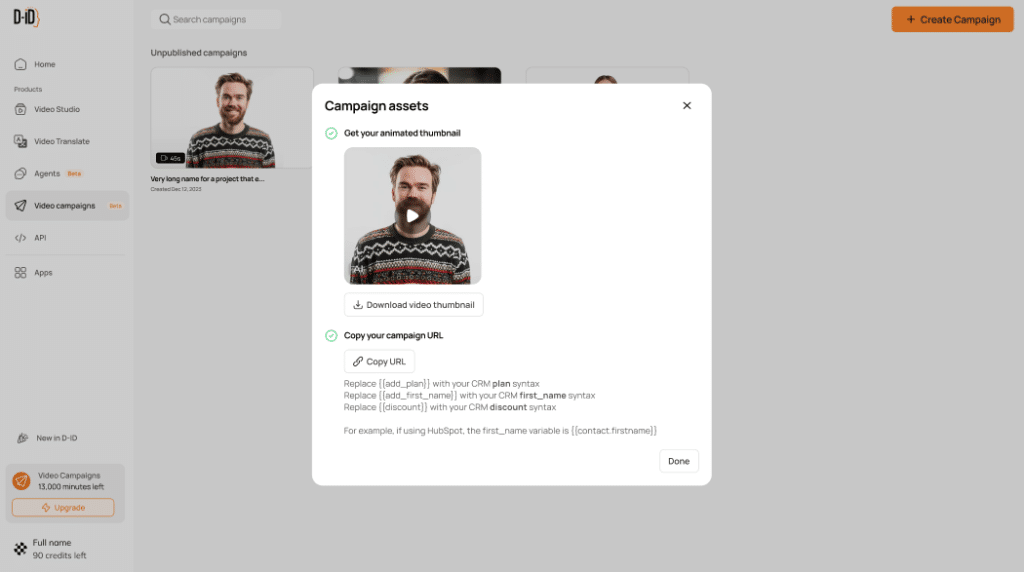
Then, click the Copy URL, and paste it as the link to the GIF image in your email. For example:
- If using Hubspot, you will need to replace {{UID}} with {{contact.email}}
- If using Mailchimp, replace {{UID}} with *|email|*
- For other email marketing platforms, replace {{UID}} with the user email personalization token.
How to find my email marketing platform personalization fields
- Hubspot
- Mailchimp
- Active campaign
- GetResponse
- Drip
- Customer.io
- Brevo
- Braze
- Hatch
- ActiveTrail
- Klaviyo
How do I start?
Just click here
Questions?
Please explore the FAQs page, or contact support for assistance.
Was this post useful?
Thank you for your feedback!